In hopes to follow my seamstress of a mother’s foot steps, I’ve been exploring sewing the past few months. It’s always been a goal of mine to design clothes and with the development of my custom fabrics, there couldn’t be a better time to start fiddling around with ideas now. But, like all things, you have to start small. In this case, small means zipper bags and scrunchies. And like everything I do, it has to be custom. The following is the making of my first custom fabric print.
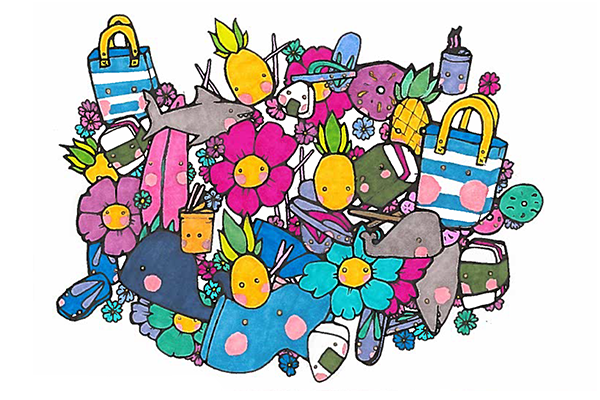
Step 1 Create Pattern
STEP 2 Make repeatable
In order to use the pattern as a fabric print, post sketch I have to vectorize and make seamless edges for repeating. A lot of the design is simplified between steps 1 and 2.

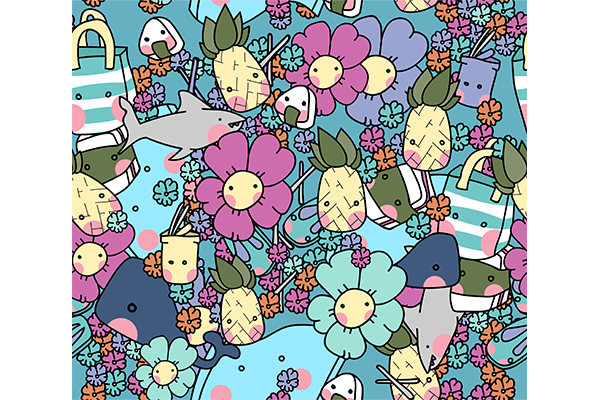
STEP 3 Order Custom Fabric
Upload and order from Spoonflower.com. I ordered Kona® Cotton Ultra, which is a little bit stiffer than Pima Cotton, so while good for crafts, I prefer the Pima Cotton for clothing.
See Surfing Veggies for Bag Production Steps